In the app
- Tap the round + "Quick Bill" button in the middle of the bottom bar.
- At the top choose "Cash sale" or "Credit sale". A cash sale fills the received amount with the full total.
- In "Bill to" search the "Party *", tap a recent party chip, or tap "+ New party" to add one on the spot.
- Under "Items" tap "Add Item". Choose "From stock" and pick the item (or "New item / service" to type one), enter "Quantity *" and check "Rate (₹) *". Add a "Discount %" if any, then add it.
- Repeat for every item. Use − / + to change quantity; swipe a row left to remove it.
- Check the "Bill summary" — subtotal, CGST/SGST (or IGST), transport, round off and "Total amount".
- In "Payment" enter what the customer paid now (see Take payment on the bill).
- Tap "Save Invoice". You see "Invoice created!" and the bill is ready to print or share.
On the website
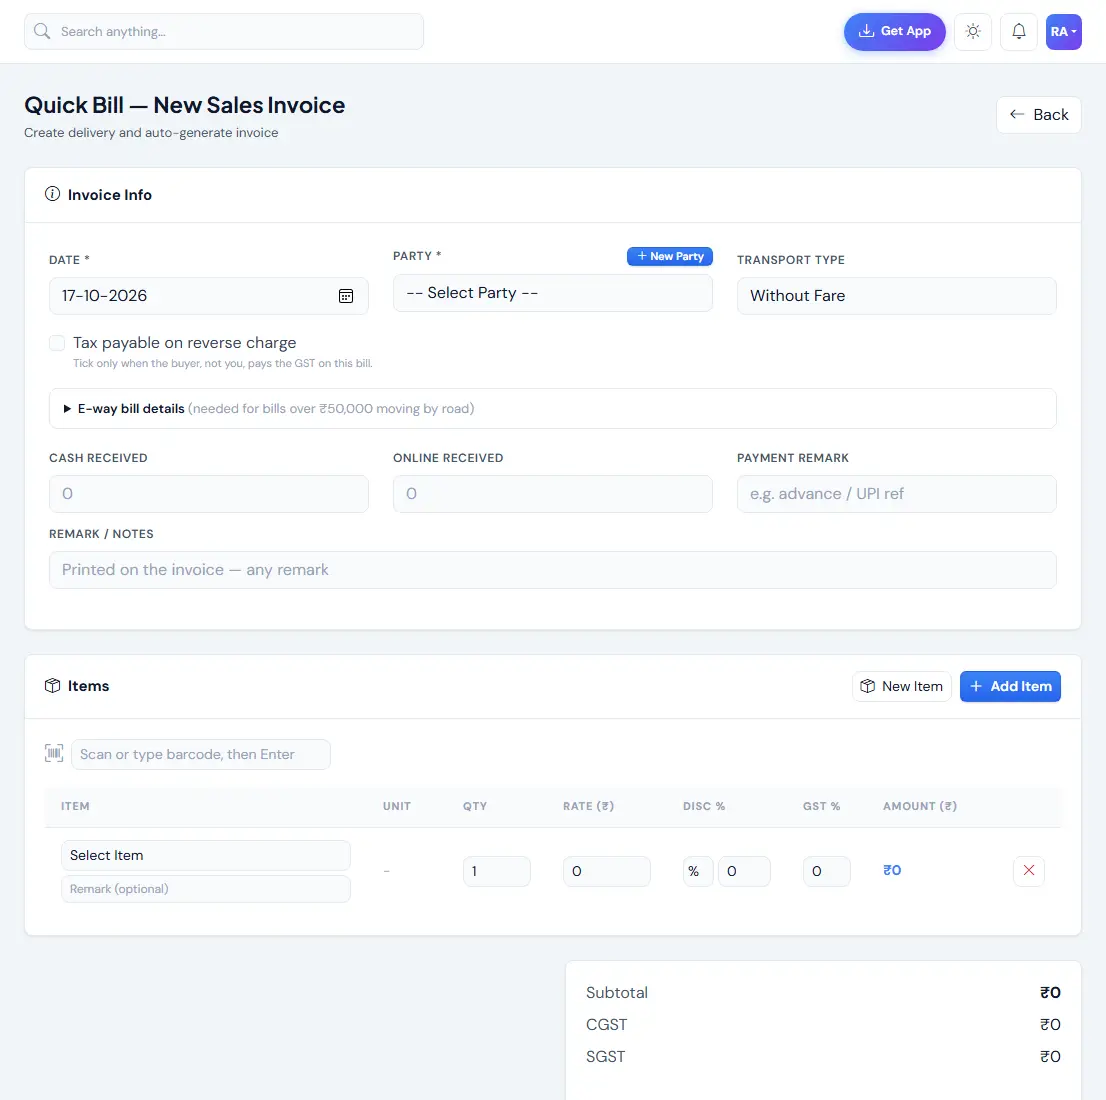
- Click "Quick Bill" in the sidebar (MAIN).
- In "Invoice Info" set "Date *" and pick the "Party *" (or "+ New Party").
- In "Items" click "Add Item", choose the item, type Qty, check "Rate (₹)", "Disc %" and "GST %". A barcode scanner works in the box "Scan or type barcode, then Enter".
- Fill "Cash Received" / "Online Received" if the customer paid.
- Click "Save & Generate Invoice".
Tip: The bill number (like INV-0001) comes by itself. Change the prefix in Settings.
If something goes wrong
- "Select party and add at least one item" — both are needed before saving.
- "Stock is short by …" — the item does not have enough stock. Add stock first, or see Stock is short.
- No GST rows on the bill — "GST Billing" is off in Settings, or the item's "GST %" is 0.
- No internet in the app — the bill is kept on the phone as a draft and uploads by itself later (Offline bills and drafts).
